The Best Prize

The days are long but the years are short “- Gretchen Rubin

Nobody ever mentioned to me when I was in the thick of exhaustion in the jungles of diaper changing, wiping 4 snotty noses and toting a million pound diaper bag on my hip that while those days were busy and hard, how equally hard it would be to be standing at the brink of new phases in my children’s lives like the one I am currently in.

I officially have a high school senior. And while I could be in much “older” phases and stages, here is where I am, thanks to 8 years of infertility. I love where we are. It is so much fun watching my children fashion themselves into the free thinking, unique, amazing almost adults that God has created them to be.

It’s really started sinking in that my birdies are so much closer to stretching their wings and flying from the nice safe nest we have provided for them. As I ponder that, part of me worries that I didn’t do enough to prepare them for life and that maybe they won’t be successful in their endeavors which will of course reflect my parenting. But, this! this time, this very age and stage is part of their own God given journey. As I reflect a little deeper, I know that our biggest goal has been to raise God honoring beautiful humans who will carry HIS love into our dark and often hopeless world.

Why haven’t I heard much about this stage? Maybe I wasn’t listening well? I realize that this stage is so much more “private” then the stages of posting the funny quotes of my 3 or 4 year old. Now mom’s Instagram is suddenly old school and I post more cautiously so as to protect and hopefully not embarrass my loves. Watching them navigate new relationships and praying more fervently then ever that God will bless them in their quests as they honor him is suddenly not really about me at all. The fun and sometimes outright amazing scoop on those relationships is not mine to spill.

I have one more school year with my oldest then she’s got plans that quite frankly terrify my on one hand and make me so proud I could burst on the other. I already set some boundaries on my calendar for the next year. I want to be more present, a lesson I never thought I’d need to relearn. I am looking for those memory making special opportunities like the one I happened upon this week. It’s so simple, it made me feel silly at its obviousness.

Recently I attended a party where we were invited to take a jar of homemade salsa for the birthday girl to judge. I used to be known for my salsa and really did enjoy making it! But I got busy. Low and behold out of the 8 entries, my salsa was picked by the birthday girl as “the winner”. I told my family as they hungrily watched me spoon the last spoonfuls into the jar that they could have the leftovers.

There really wasn’t any left and I heard my family muttering in the background about who was going to be the lucky one to finish the remaining bites of mom’s prize winning salsa. Over the next few days I made more to take to a dinner and again heard the wishes of those I love most who still were hungry for my salsa.

Tonight it hit me how simple it would be to make a batch for them, so I did. I chopped and diced and added all my secret ingredients because somehow like my mama before me, my recipes don’t always seem to turn out so well when I try to relay to my kiddos how to make them. I put it on the top shelf of the fridge with a note that said “because I love you…”

You should have heard the squeals when it was discovered.

The best things in life are like that. Simple. Mundane sometimes. Little. Not necessarily prize winning but important none the less.

A Spoonful of Comfort

Today my precious baby should be turning 11. Instead we are in year 7 of her living in Heaven.

Grief has not been gracious to me pound wise. This year, I have taken some drastic steps to change my habits and hopefully my thought process in the kitchen, which has always been a haven to me in different seasons both grief and joy filled. While food is the center of so much, I am finding a new found zest seeing how yummy healthier can actually be!

While learning to turn to God for comfort instead of food, I can’t help but believe that he doesn’t condemn us for enjoying the beauty in the gifts he surrounds us with. I can’t imagine that He wouldn’t enjoy the tastes and smells of a ripe juicy peach or the smell of coffee brewing. After all He is the one who created us with emotions and the responses to them.

Recently I stumbled across a delicious peace crisp that I have been experimenting with. While I am still perfecting it, I found it to yummy to not share. It’s warm fall-ish smells filled my kitchen as it baked and did not disappoint when I scooped the first spoonful into my bowl. I was delighted to see the combination of ingredients contained very little sugar content and is happily gluten free. The nutty crumbly topping is my favorite.

A few things to remember if you try this recipe….

I have tried it with apples and it is equally delightful! Frozen peaches can be used though the end product is more runny. It is best when used exactly as written and with fresh peaches however today I tried maple syrup instead of the brown sugar and while it definitely doesn’t seem to brown as nicely it was still quite amazing.

Without further ado, here is the recipe!

6 peaches

1/3 c honey

2 T. cornstarch

1 t. vanilla

1/2 t cinnamon

Slice peaches and combine all items together in a 9×9 pan.

Topping:

1 c oats

1/2 c almond flour

1/3 c chopped nuts (I use pecans)

1/3 c brown sugar

1 t ginger

1/4 t salt

4 T softened butter

3 1/2 T greek yogurt

Bake at 350 for 35 min OR until crumbs are lightly browned.

Enjoy with a glass of milk or a scoop of Greek yogurt.

Must Have Muffins

Over the summer, I came face to face with some pretty big decisions. With the last few years being ones I spent very sick, I had acquired quite a few pounds my doctors referred to as Prednisone pounds.

With some of the health challenges I have had, diabetes has been on the radar for quite some time. At my summer physical, my practitioner informed that now was the time to make some changes if I did not want to get to that actual diagnosis.

Since weight has always been a struggle for me, I was overwhelmed to think about what all this might mean for me. I have always enjoyed being in the kitchen. Baking is probably close to my most favorite pass time ever!

As I was praying one morning I opened up my computer and the first thing that came across my screen was an ad for the New Life Promise program. I haven’t ever felt so compelled and hopeful as I watched Isabel explain the setup of her lifestyle plan. So I paid the $49 and started off.

Since then, I have actually discovered how pleasant eating well can be. I am steadily losing pounds (16 at last check after 1 month on plan) and remain amazed at how full I feel. There are no special foods or calorie counting. I have even discovered how I can eat out with my family and friends and still stay focused on the goal. It takes thinking ahead, pre-planning and of course some experimenting.

After the initial phase, I am learning about making things that satisfy my sweet tooth. Most days I don’t feel like I am “dieting” at all even though it takes me a second to refocus when someone offers me a fresh yummy like peach pie. I still keep my Food Meets Faith cookbook on my counter, but am slowly but surely getting into better habits independently, that are so much more helpful to the body God has given me to take care of.

One of the things I keep around at all times is these muffins. Even my children like them. I make a batch each weekend and freeze them so I can easily pull them out for a quick breakfast or a snack to pack in my lunch bag when I head to work.

Almond flour is a bit different to learn how to bake with, but I have found it delish and very filling!

2 1/2 (Needs to be exact!) very ripe Bananas

1 T Softened Coconut Oil

1 egg

1 1/2 c Almond Flour

Pinch of Salt

1/2 t bkg. soda

3/4 c nuts (I use pecans)

1/2 c dark chocolate chips (preferably containing no or very little sugar)

Preheat oven to 350

Grease 8 muffin cups.

Mix all ingredients well and divide into muffin tin.

Bake for 20-25 min or until nicely browned on tops.

Let set in tins for 30 min. Use knife to make sure nothing is stuck before removing from tin.

Enjoy!

You asked for it – Installment #4 “Nana’s Biscuits”

**this post originated a few years back for my baby sis who lives 1000 miles away making it impossible for us to bake together as much as we’d like…

A favorite in our household is biscuits and gravy.  I am not the queen of either by any means but recipes are made for tweaking and perfecting and trying again.
I have been working for some time on simple biscuits, like my mama makes.

Now getting a recipe from her is kind of difficult.  She puts a pinch of this and a little of that along with a whole lot of love into a bowl and out come 100% pure yummyness.

I think she may have once upon a time kind of followed a recipe from my her childhood friend, Sylvia so part of this credit probably actually belongs to her.

There are those childhood favorites that we just must capture and pass along to the next generation….this is definitely one of them!

  • 1 c. flour (she always used King Arthur)
  • 1/2 t. salt
  • 2 t. sugar (organic evaporated cane is what I use)
  • 2 t. baking powder
  • 3 T. butter
  • 1/2 c. milk
First essential: Start with your favorite bowl.
Mine is an old antique find I got at a yard sale for $.50
Mix all dry ingredients with a fork
Cut butter into dry mix
With your hands or a pastry cutter make crumbs with the butter and flour mix
Gently add milk and mix with fork
You will have a moist, slightly sticky dough
Pat out into a small circle.  Mama always drops her dough onto the baking sheets
so that works too.  But we prefer the rolled dough.
A juice glass works perfectly to make just right circles.
Place onto baking sheet and bake at 425 for about 10 minutes.
Make sure to not overbake.
We love to eat them in many different ways, including hot with
real butter!
We are also fans of topping them with jelly, honey, cheese or real maple syrup.
No matter how, they are always delightful to the last bite!
What is your favorite sentimental recipe?

Creative Chaos ~ Inviting Children Into The Kitchen

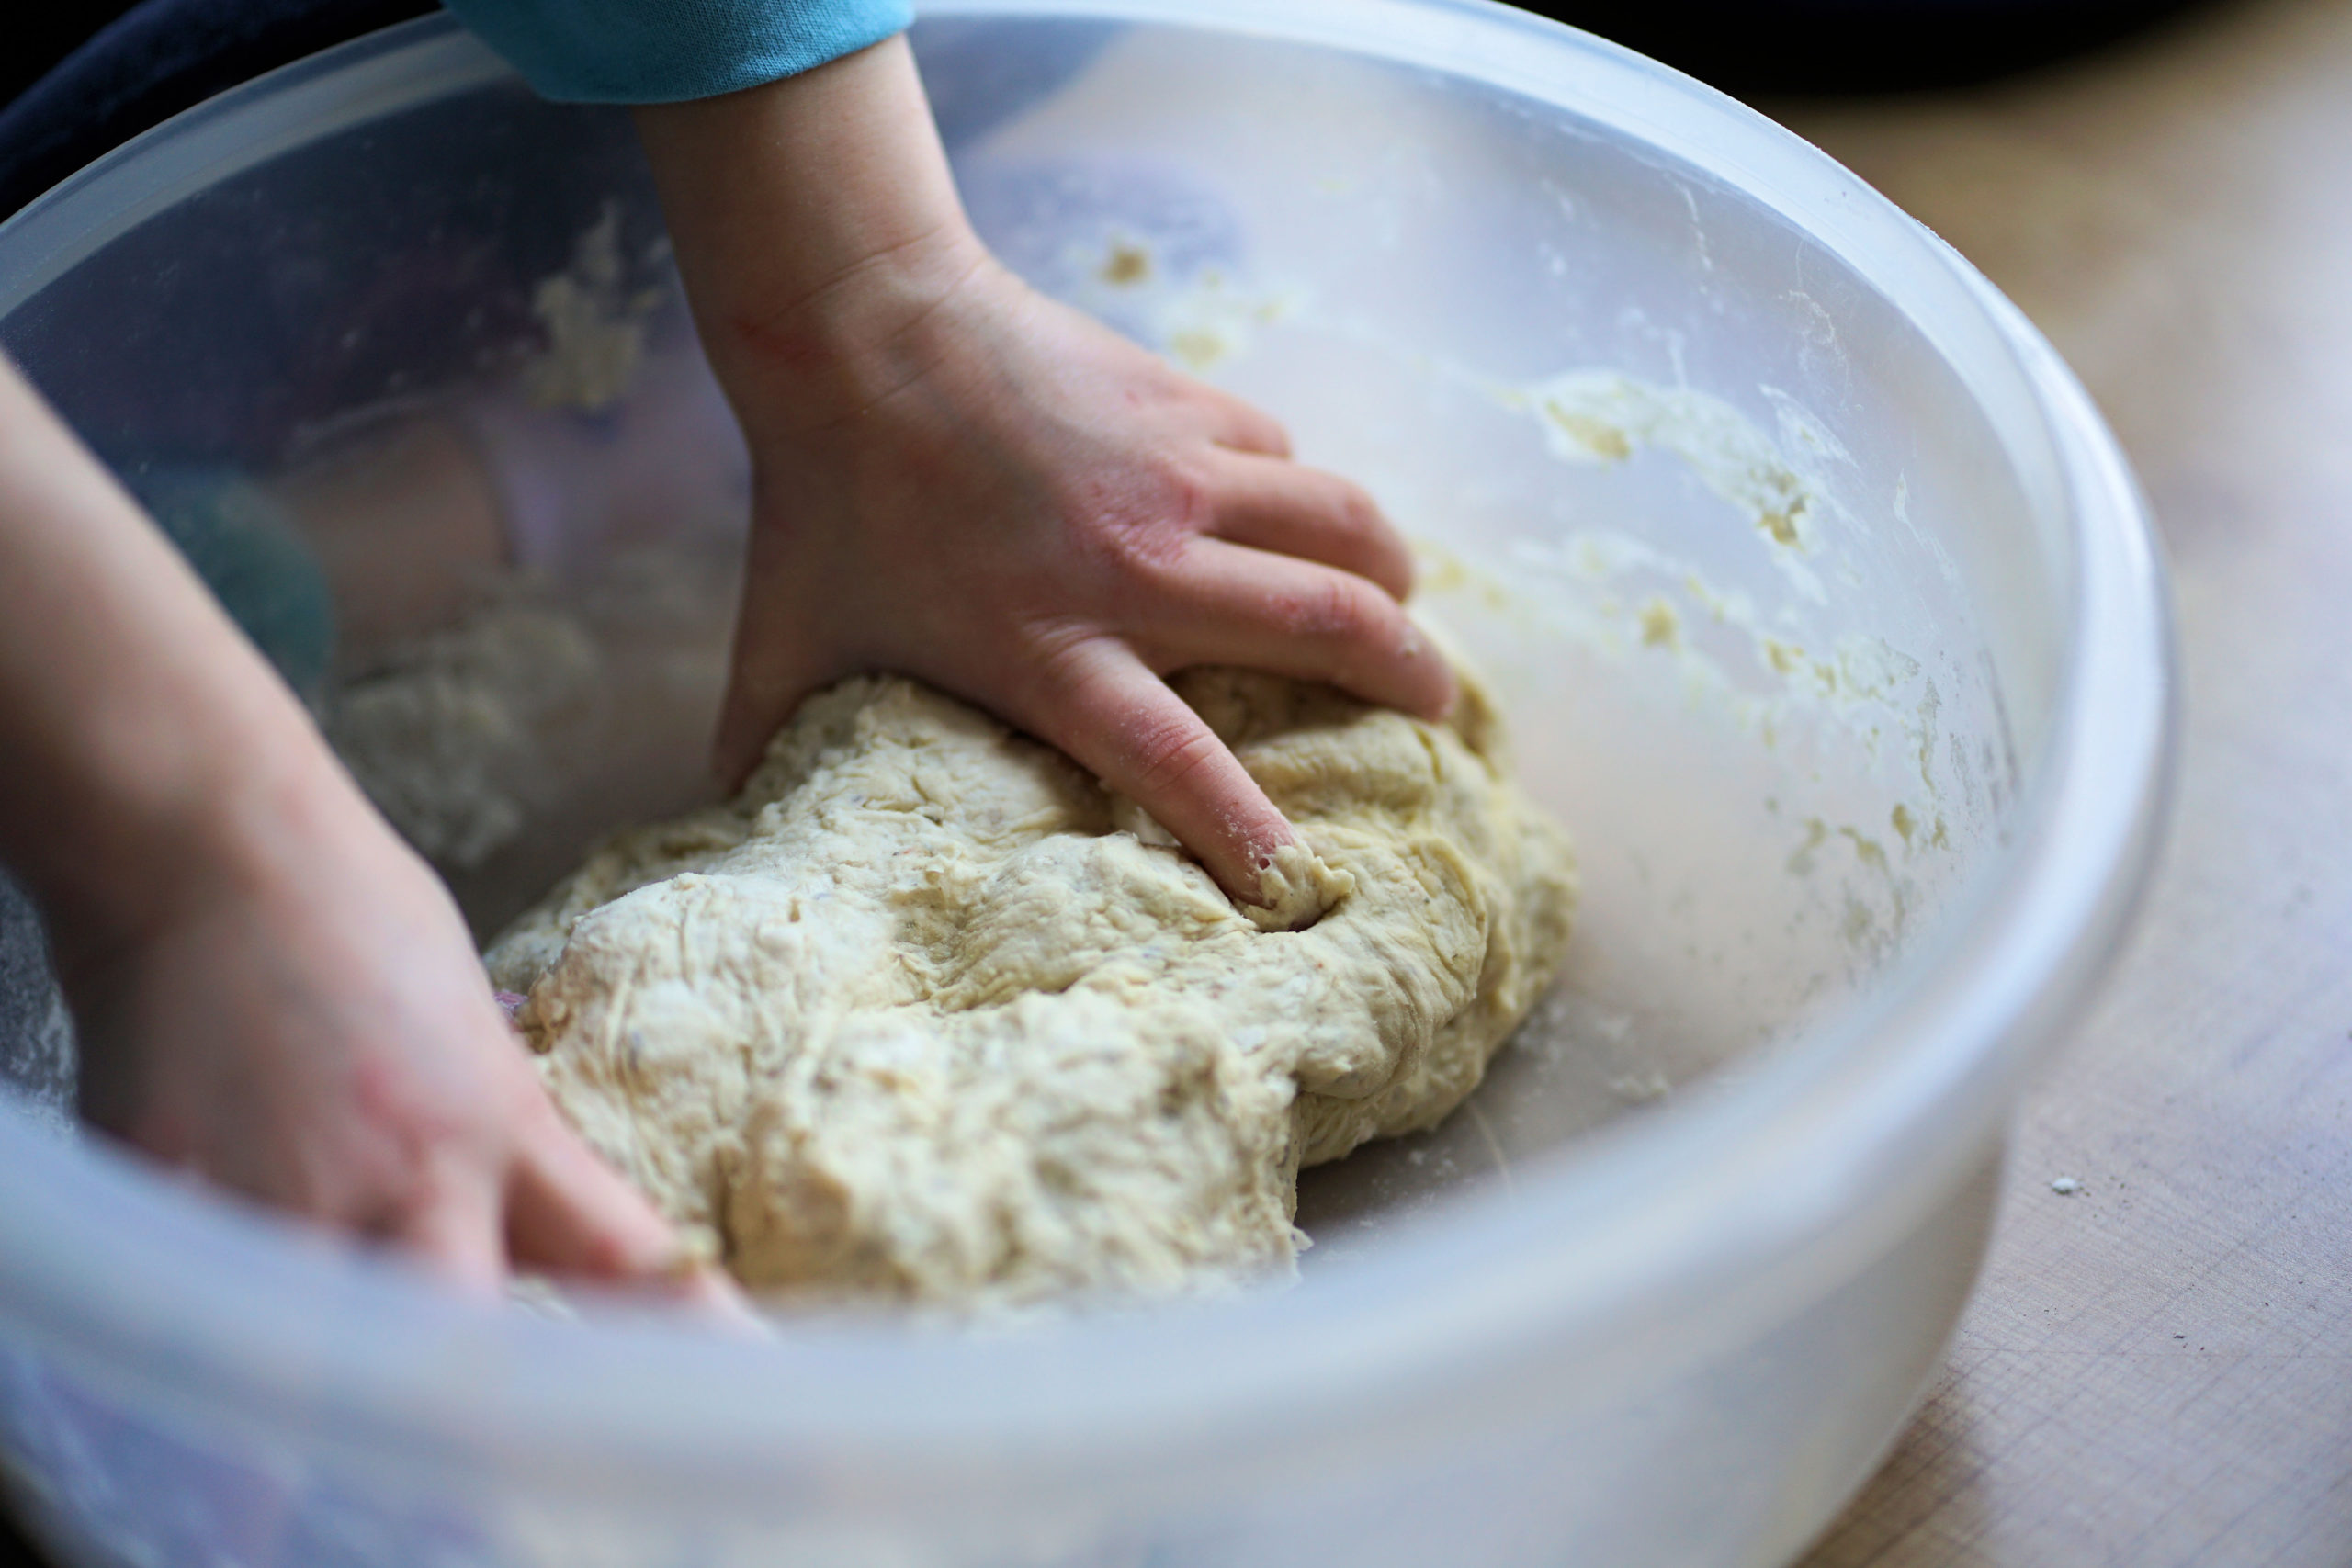
If you’re anything like me you might shudder at the thought of having your young ones help in the kitchen.  After having 4 babies in 4 years, the many needs of littles took precedence over my love of cooking and baking.  

Now as I navigate through what was once my haven, I sigh as I remember my clean, organized, pre-motherhood kitchen.  Remnants of toast and strawberry jam occupy one corner, while a dirty pot someone warmed hot chocolate in sits unwashed on the burner.  A jar of peanuts with the lid half off sits beside my flour and sugar canisters. 

Can you picture it?

Now, don’t let me mislead you with the title, I am not always an inviting mother.  My descriptive tag could usually more accurately be “momzilla”. I confess that on any given day,  there may be frequent grumping and loud roars at my young one’s attempts to help me in what I consider to be my space.  Sadly, I am guilty of crushing tender hearts, sending them away in tears as I huff and puff, hurrying to just get done. 

As my children have grown into independent human beings with definitive tastes of their own, it has become more challenging to prepare a good balanced meal everyone consumes willingly.  

Each meal turned mom into an on demand, short order cook. The realization of how little my children actually knew about the kitchen and what happens there reinforced the reality that my impatience and inability to share my space was actually doing my children a huge disservice. 

Since we are a home school family, I decided to implement food prep and time in the kitchen into our schedule.  Each of my children, ages 13, 12 & 10 now cook independently or at least help me cook on their scheduled day. Doing so has forced me to be intentional in not making our schedule to full, a big key to a harmonious shared space.  My own grumpy doesn’t seem to sneak out as easily when we aren’t rushed. Plus, each meal has some kind of learning involved. Both reading and math are present in our menu, which is my sneaky way of practice for the one that struggles.  Surprisingly, I must say that involving my children has greatly decreased the appearance of the picky eating monster and I’m delighted to simply cook one meal that all enjoy. Watching their creativity as they plan, prep and prepare their meals has made my mama heart proud.  

When our oldest daughter was about 8 or 9 all she wanted to do was concoct her own recipes.  Though some things did not turn out as she envisioned, she came up with some yummy treats like chocolate apple pie. (it’s really quite delish!)   While she would rather be out playing volleyball, she never ceases to amaze me with her meal plans and foodie ideas.

Daughter number 2,  is my naturally born chef and at age 10, literally spends daily time serving us.  I find her entertaining to watch and wonder often what God is preparing her to be and do.  She tastes and samples as she goes, making sure each flavor comes through just right. She’s become quite the salsa making expert and loves coming up with healthier dishes for us to enjoy. Some days when ingredients are smeared all over the stove and every square inch of counter space, I have to bite my tongue and gently and quietly help her learn how to properly clean her cooking space when she’s finished with her creations, which is a life skill in and of itself.

Recently as the family bemoaned the fact that there was no dessert to be found in the house, my son asked if we could try making our own biscotti.  I had no idea at that point, that he even knew what biscotti was, but we had a bunch of fun looking through recipes till we found the perfect one. The whole container full was gone in about 48 hours so we set out to make them again, adding more of our own personal flavors the second time around.  While they still have sugar in them, it is less than a traditional cookie and I feel like I am serving a bit of a healthier option. Plus he and I made some great memories in the process. 

Here are some of our kid tested and approved recipes that are used on a frequent basis. 

Fresh Salsa

1 hot pepper

1 cucumber (optional) 

1 bell pepper

3 cloves garlic (crushed)

4 sprigs fresh cilantro (or 1 T dried) 

1 small onion

1 qt canned tomatoes (drained)

Juice of 1 lemon or lime (about 2 T) 

½ T salt

I allow my children to use the food processor when I am present.  It has been the easiest way to prepare this quickly unless you love chopping. 

Place all ingredients into food processor except for the tomatoes. We like to see and taste the individual flavors so we just pulse till nicely blended not pureed. 

Place chopped items in serving bowl and do the same with the tomatoes. 

Mix gently.  Refrigerate till serving time. 

This has become a staple in our home as it tastes fresh even in the dark days of winter. It is the basis of several meals and snacks including hay stacks and wet burritos both of which can be a yummy way to incorporate fresh veggies. 

King Arthur Biscotti

6 T butter 

Scant ⅔ c sugar

½ t salt

3 t vanilla

½  t almond extract

1 ½ t baking powder

2 eggs

2 cups flour

Add ins – our favorites are any kind of nuts especially peanuts and pecans, chocolate chip (white or milk).  We usually add about 1 to 1 ½ cups into the dough at the end.

Side note: We found this original recipe on my favorite King Arthur Flour website. I have found that these seem to turn out better using that flour. 

Preheat oven to 350.

Line 13 x 18 baking sheet with parchment paper. 

In large mixing bowl, beat butter, sugar, vanilla and almond extract, salt and baking powder till creamy.  Beat in the eggs. At low speed, add flour. Lastly gently fold in chosen add ins. Dough will be sticky. Divide dough in half and shape it into 2 logs about 10 inches long by 2 inches wide and about ¾ inch tall.  Wet a spatula and use it to smooth out the surfaces, making sure each log is the same thickness so that they will bake evenly. Bake the dough for 25 minutes. Remove from oven. Using a spray bottle filled with room temperature water, thoroughly spritz the logs making sure to cover the entire surface. Reduce the oven temperature to 325.  Place trays back into the oven for 5 minutes, then pull out and slice into ½ inch slices with a bread knife. Set slices on edge and place back into the oven for another 20 to 25 minutes or until they start to feel dried out and turn golden brown. 

Transfer to a baking rack to cool. We store in large glass jars. 

We love sipping/dunking these into hot chocolate, chai, coffee or even just plain cold milk. 

Our Favorite Family Salad Bar

Lettuce and/or other greens (I have learned my family loves the butterhead lettuce I purchase pretty much year around at Costco.)

Cucumbers

Peppers

Onion

Carrots

Broccoli

Cabbage

Eggs

Cheese

Bacon

Grilled Chicken, steak or turkey (Can grill a large batch and freeze for later!)

Various dressings

Recently some health challenges spurred me into thinking about incorporating even more veggies into our diet.  While I don’t usually run into issues with desserts and yummy main and side dishes, getting my kids to choose to eat salad seemed impossible until I started asking them for input on what they think might be salad topping. I have found that my children are fascinated with and love to use my kitchen gadgets.  This makes chopping, shredding and dicing a breeze. We serve each ingredient in a separate bowl, as I have found allowing each family member to assemble their own salad makes for a much happier meal time. 

The protein options actually make this a super simple and complete meal that leaves even my big eaters full. 

While I still am guilty of displaying a less than Christ like attitude to my children when they come into my kitchen,  I find it helpful to recall how patient Christ is with me in the learning process messes that I make. I am also painfully aware since my youngest daughter died suddenly,  how quickly life can change and that we may not always have the children we take for granted.  

God has gifted us with them and instructs us to teach them in the way they should go. Teaching takes time and patience.   I can’t help but think there can’t be a much more fun (and delicious) place to do so than in the kitchen. 

You Asked For It – Installment #3 “Sheri’s Secret Cheesecake”

Our family just got back from a week at the ocean, which is our very favorite time and place. We usually go in the month of May which means I always try to create something extra special and super yummy for my baby sister Rhoda’s birthday. She usually asks for my cheesecake. I am always delighted with her choice and haul all the stuff along so I can make it just right. This year since my kids decided they actually like cheesecake, I figured I should make 2 so I made one in a 9 inch pan and another in a 10 inch.

Years back when I worked at the same little tea shop that gave me the inspiration for scones, the owner, Sheri, would usually always have some form of this cheesecake on hand. We always joked about her delicious recipes being top secret hence the “secret” in my title. She had such neat ways to make recipes pop with flavor. Her add in items were sometimes surprising like the white wine in this recipe but always seemed to take the recipes up a notch. While I am not sure if this is actually her recipe or not somewhere over the years, I dubbed it hers and always think of her when I use it.

Making a good cheesecake seems to rest on a few precise items. Time is essential. Then a good springform pan, quality heavy whipping cream and a whole lot of love round out the essentials. A good food processor is helpful for making the perfect crust.

Without further ado…here we go! For the crust I love to use what I have. If I want chocolate flavors, I use a packet of oreos and blend till smooth in the food processor. The oreo frosting serves as glue to hold the crust together. Simply press into bottom of pan. I also love using graham crackers or animal crackers or a combination of both for a plain crust. You will need about 1 to 1 1/2 cups of crumbs dependent on how much crust you like. I then add about a tablespoon of soft butter and mix well then press into pan. I do not prebake my crusts.

  • 3- 8 oz cream cheese softened
  • 1 1/4 c sugar
  • 1 t vanilla
  • 1 1/2 t white wine
  • 4 eggs
  • 1 c sour cream
  • 1 c heavy whipping cream

Beat the cream cheese, sugar and vanilla & wine together. Add the 4 eggs individually, beating well after each addition. While still beating, add sour cream and heavy cream. Continue beating till evenly mixed making sure there are no lumps. Pour carefully over crust. I wrap aluminum foil carefully around the bottom edge of the pan and then place on a cookie sheet with a bit of water which seems to help in the baking process. Bake at 350 for 1 hour. Avoid the urge to peak as this could make your cake fall or crack. Turn off oven and allow to rest for 20 minutes. Then place a wooden spoon handle in the oven door and allow cheese cake to cool completely before taking out of the oven. Run knife around edge and open the springform. Carefully remove. Refrigerate until ready to serve. Makes excellent left overs if you can sneak some into hiding.

We love all sorts of toppings including, fresh fruit, chocolate, caramel, pie filling and more. Another favorite is adding 1 cup of mini chocolate chips into the batter.

Practice makes perfect! I never get weary of experimenting. I hope you enjoy this as much as our family has!

You asked for it….Installment 2 – Hannah’s Banana Muffins

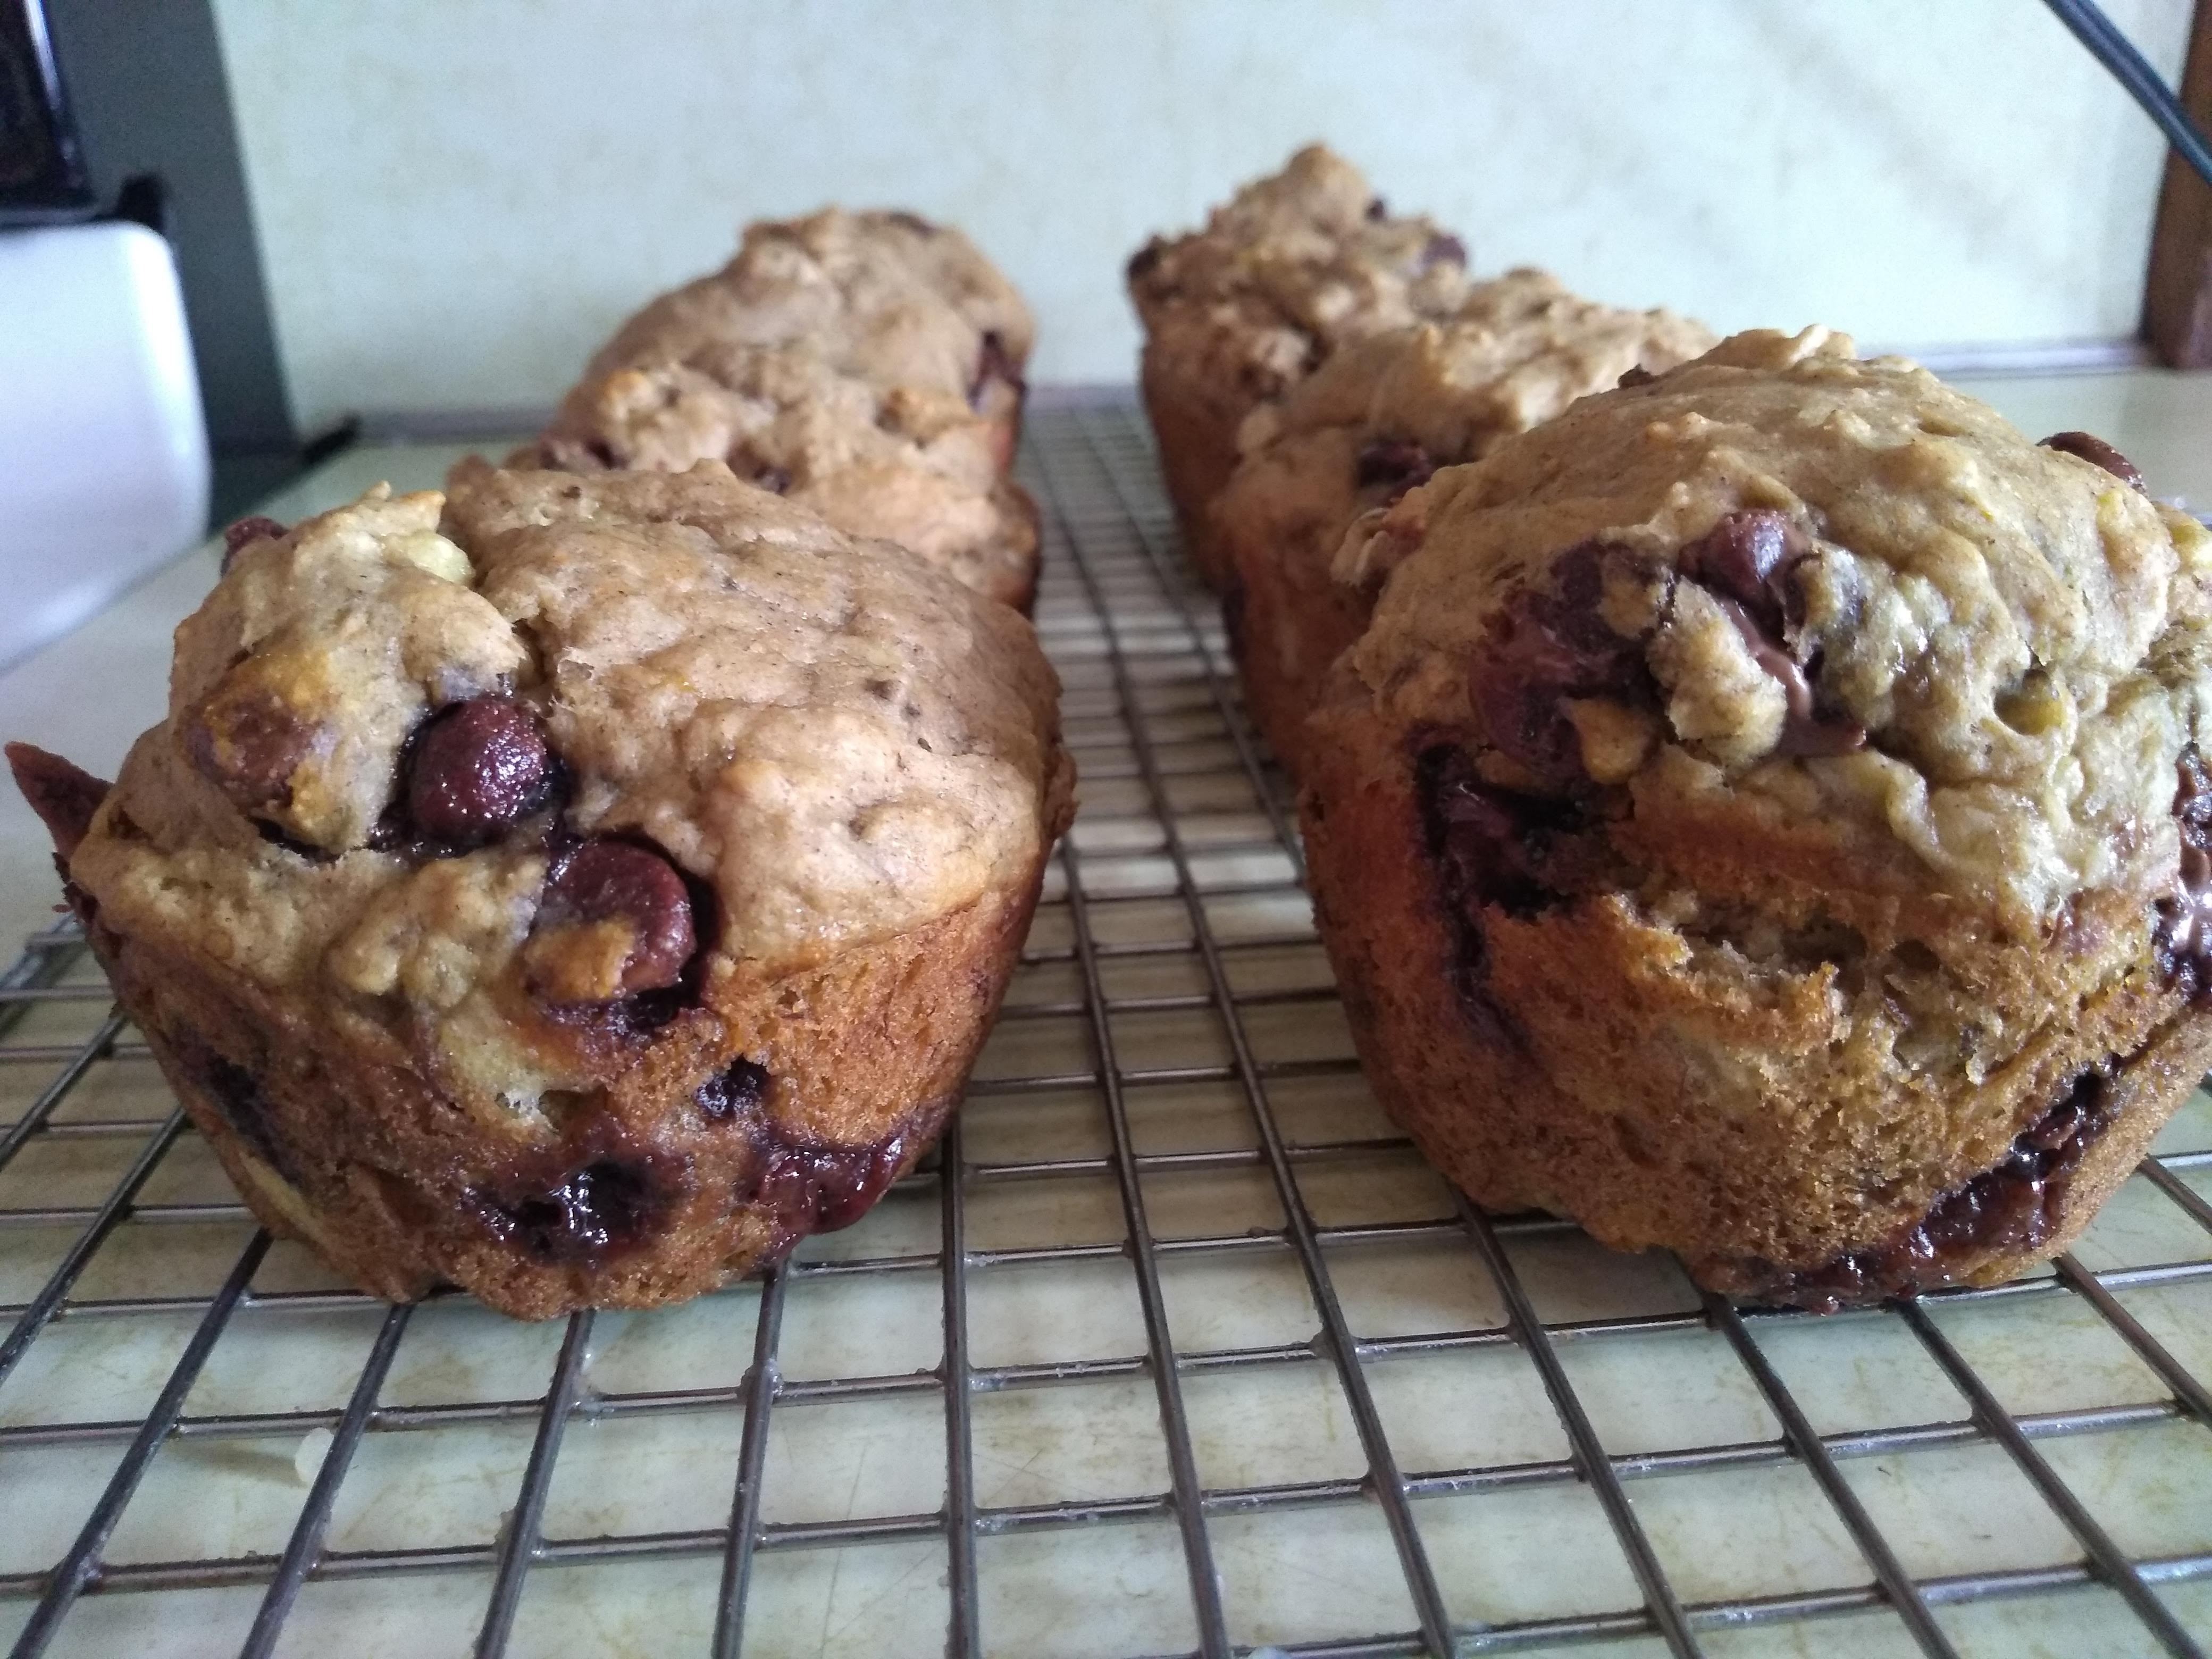
I am somewhat of a fanatic when it comes to food. Trying to making food healthy and yet not taste like dry cardboard is high on my to do list.
A few weeks back I paid a visit to my newlywed friend Hannah.  As we sat chatting she served up all things appropriate to my current “diet”.  She was super excited to share her freshly made loaf of banana bread. Now I love banana bread but my family isn’t a huge fan, so it is not often on our menu. Hannah had some delectable chocolate pieces in her loaf and informed me it was low in sugar.  It was delish, so of course as I left I asked for her recipe which she promptly shared. The original recipe was called Skinny Banana Bread and was authored by Lauren Allen. 
I set out to create some yummy of my own and have been quite delighted with the results.
 
I decided first that I would bake the loaf in my muffin pan since I seem to have bad luck with getting the loaf baked all the way through before the outside is burned.
Secondly, since I am still trying to steer clear of sugar, I decided to see if I could cut the sugar out altogether though the original recipe only has about 1/2 cup sugars (brown and white) 
total,  since bananas are a sweetener on their own.  It worked. Trust me, I did a happy dance.  Now, if you have a hankering for a bit of extra sweet, add a few chocolate chips which are super yummy and make these a hit with my kidos.  The excellent part is they store perfectly for an easy to grab breakfast with your cup of coffee or a mid morning treat…IF the kids leave any for me.
And of course I think of my sweet Hannah whenever I make them. 
Are you drooling yet?  Here is the recipe with my latest tweaks.
4 bananas mashed
1 egg
1 T. vanilla
1 t. cinnamon
1 t. baking powder
1 t. baking soda
1/2 t. salt
*1 1/2 c flour
2 T. butter, melted
**yummy add in items:  Chocolate chips, pecans, coconut…the list of possibilities is endless.
* In my last batch, I used freshly ground whole wheat instead of my typical King Arthur Unbleached (amazing stuff for all things baked)  Good flavor,  but as with most whole wheat baking you must add a bit more baking powder/soda.  (I am still tweaking those exacts) Or you could try 1/2 white flour and 1/2 wheat.
**My favorite add ins are 1/4 c chopped pecans and 1/4 c chocolate chips.
Mash bananas in mixer bowl. Add rest of ingredients and mix well.  Grease 8 muffin cups in a regular sized muffin tin or line with paper.  Fill muffin cups 3/4 full.  Bake at 350 for about 30 minutes or until nicely browned. Test with toothpick to make sure they are baked through. All ovens are different…. Try them!  Let me know what you think and what tweaks you made. 
My sweet friend, Hannah, the new Mrs. Yang (the fact that she’s baking things in her own kitchen makes me feel soooo old.  After all, she was a darling 2 year old just yesterday)

Best Ever Scones

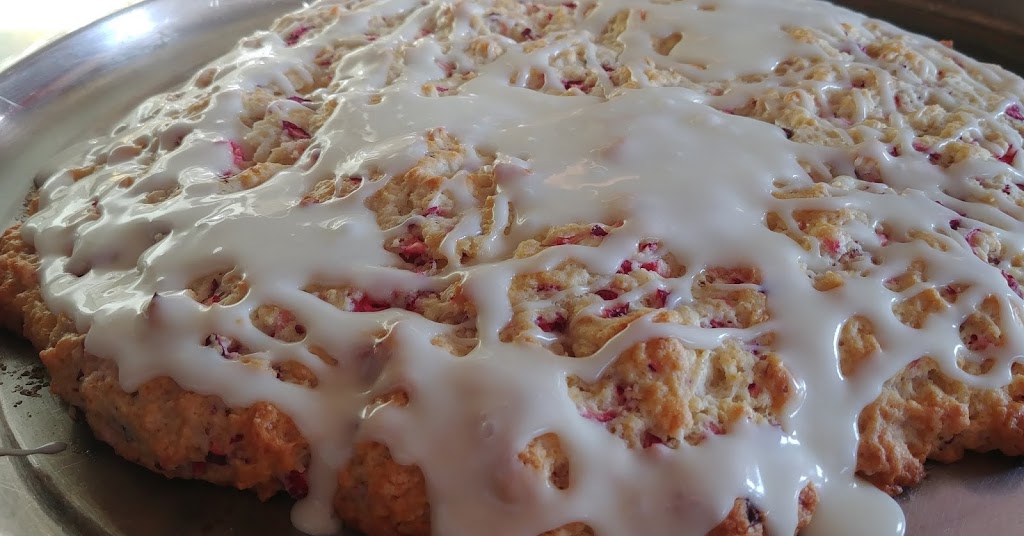
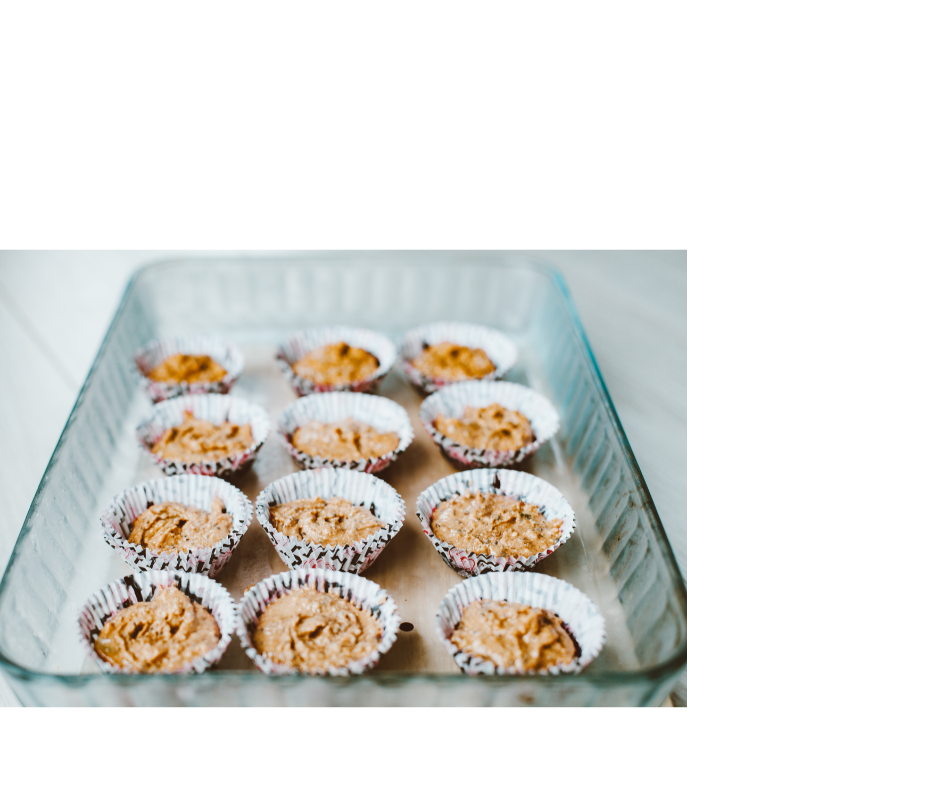
Year ago I worked at a wonderful little tea room where the owner made the most delectable ever scones. Since the place closed, the recipes also are seemingly forever lost. 
So, I went on a quest to find THE perfect recipe. In my mind, I remember my dear amazing chef friend telling me that the secret to a good scone was heavy cream and butter.  Real butter. 
I tried various recipes but none of them fit what I had in mind and the happy sweet memories of hers which just melted in your mouth…until I stumbled on one from an online source called Katie’s Cucina. It met all the criteria for ingredients, simplicity of putting together and taste! I added my personal touches and bam!  I had a personal favorite and it became the most requested thing I have ever put together.  I have since supplied scones for many different events/get togethers. They are a treat that my kids all enjoy and are a quick breakfast or snack. Now that I am not currently doing gluten, the next thing on my to do list is figuring out the delish in gluten free but for now, I will share the love!
*2 cups flour (See note below on flour)
*1 T baking powder (yup you read that correctly!) 
*1/2 t salt
*2 T sugar (I prefer raw sugar)
*5 T butter
*1 to 1 1/2 cups heavy whipping cream
Mix all dry ingredients together well. Add butter like you would to a pie crust (crumbly and pea sized in shape). Add enough of the cream (at least 1 cup) to make a wet sticky dough that is not runny. Depending on the add in items I find that 1 and 1/4 cups are about what I need.  Press onto tray. I usually make mine about 3/4 to 1 in thick. 

Bake at 450 for 15 to 20 min until lightly browned.  Do not overbake! 

Mix in your choices of flavor.
Here are some we love!
Blueberry: 1 1/2 c blueberries (fresh is best but frozen works, just eliminate a little of the liquid in recipe and be prepared to bake a little longer. Some enjoy lemon in this so you can add 1 T lemon to the liquid in the dough and top with lemon glaze. (Recipe below)
Lemon Poppyseed: 2 T poppyseeds and 1 T lemon juice added to the dough. Top with lemon glaze. (Recipe below)
Cranberry/Orange: 1 c fresh or frozen cranberries chopped. 1/4 c orange juice substituted for part of the cream. Can add chopped pecans to this combo for some real delish! Top with orange glaze (recipe below)
Kid’s Favorite – Chocolate Chip: 1 c chocolate chips or 1/ 1/2 if you really like chocolate. Top with plain glaze. (recipe below) 

My Sister’s Favorite – Raspberry Lemon: 1 c raspberries.  1/4 c lemon juice subbed for part of the cream. Top with lemon glaze (recipe below)  Raspberries are messy so it is best to just press them into the dough after you have it pressed onto the tray. 

Bacon and Cheese: Omit sugar from recipe.  Add 4 slices bacon, fried and crumbled to the dough. Mix 1/2 to 3/4 c cheese into dough. Sprinkle more cheese on top. ( I do not use glaze on this one obviously)

Cinnamon & Peaches:  Add 1 t. cinnamon into dough.  Slice 1 peach into thin slices onto the top of your dough. Gently press into the dough.  You can omit the cinnamon from the dough and gently sprinkle on top of all to avoid what looks like whole wheat dough and makes people suspicious (Ha!). Top with plain glaze (recipe below) 


Glaze recipe: 
I am bad about using a pinch of this and a bit of that so this is sketchy.  If you start out with the powdered sugar and not the liquid you should be fine.
I usually start out with about 1/2 c powdered sugar and add liquid slowly till its the consistency we like.
For lemon or orange add about 2 t lemon/orange juice to start.  Mix until no longer lumpy.  You want a smooth not to thick appearance.
For the plain start with 1/2 c powdered sugar and 1 or 2 T cream or milk. 

Other tidbits
*I have found King Arthur Unbleached to make a totally different, light and fluffy scone then the other flours I have tried. (varieties of white and whole wheat flours)
*Berries and fruit in general can be messy and make the scones runny/sloppy.  Handle all berries with care and try not to smoosh them as you mix them or press them into the dough. 
*I love making one batch and dividing in half as not all of us like the same kinds.  1 batch feeds our family of 5 and when I use for breakfast it is the main item on the menu.   
*You can make them in any shape you want.  I usually do them round. You can fit 2 small circles from the one batch onto one regular size pampered chef jelly roll pan.  
*Make sure to use a pan with sides if you don’t want a buttery mess in your oven. 
*These are super simple and I can get from start to finish in about 30 minutes!

Most of all, get a cup of coffee ready and ENJOY!

Easy Peasy Healthy Lasagna

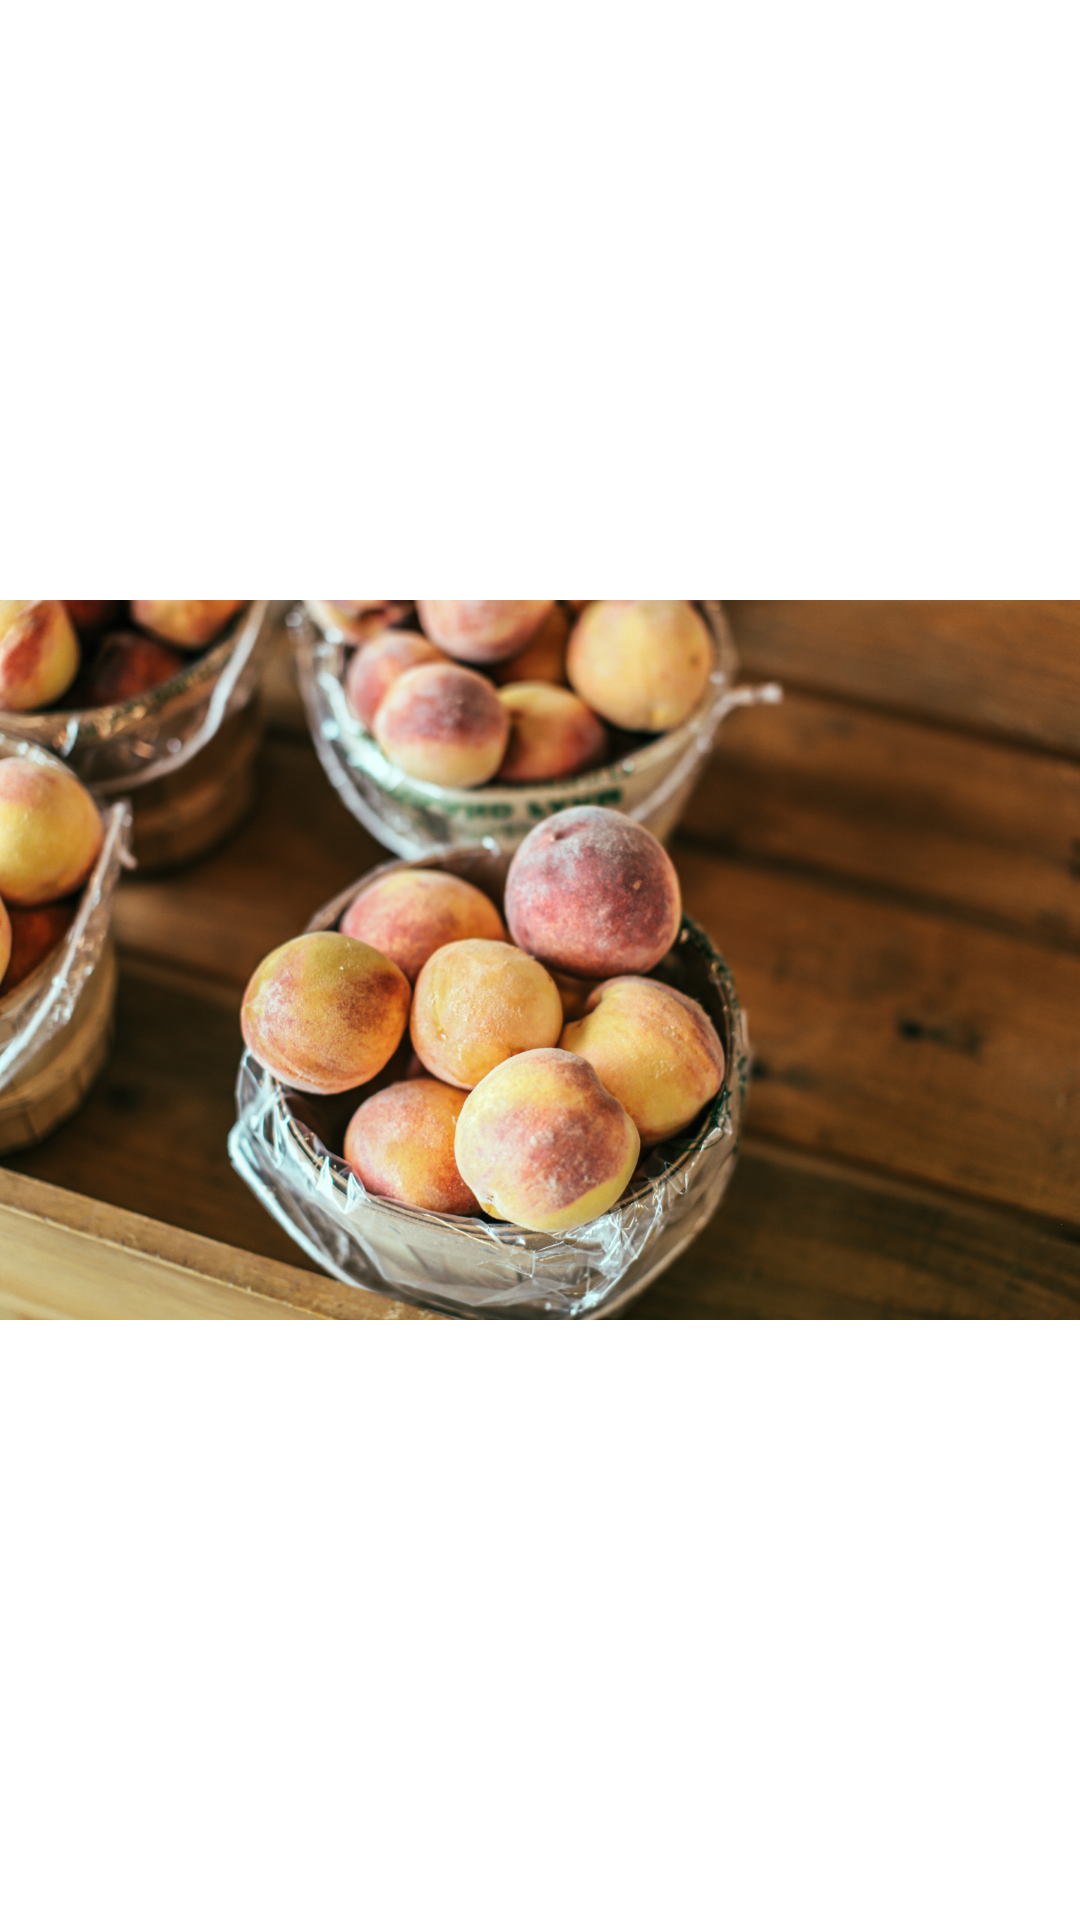
I am always on the quest to better our diet as a family.  That can be challenging with a dear hubby who grew up on the typical American Mennonite diet consisting of high amounts refined white carbs, cream of mushroom soup and Velveeta cheese. Tonight however I concocted something healthy that actually ended up being quite tasty.  Not only did I use whole wheat lasagna noodles (bleh is what I would’ve thought about that before trying these!) I actually used my trusty vita mix to whip up an amazing very green (literally) cheese concoction that won the hearts of my kidos who now think green cheese is the coolest thing ever. (kind of reminds me of the fun I have sneaking cabbage into the Vita mix ice cream I make for them–but that’s a post for another day when it’s much warmer. And hey don’t knock it before you try it- it really is good too!  Come over and I’ll make you some just to prove it)
Here is how I did it:

I started out with these. For a 9 x 13 pan I used one box and 2 or 3 noodles from another
Begin by preheating oven to 350
Brown 1 lb burger of your choice
I brought up a qt of my home canned tomato/pizza sauce and started out with some of that in the bottom of the pan then laid out the first layer of noodles.
I covered that with the yummy green cheese mixture which consists of the following:
1 c Ricotta cheese (which BTW I got in a large container at a bargain price and froze in cup portions)
3 cups fresh spinach
1/2 c Parmesan cheese (preferably fresh)
1 egg
Blend all ingredients in blender till smooth and green   (LOL)
Follow with another layer of noodles then layer of burger then noodles again.  Top with rest of sauce
Pour 1 c water around the outside (not on) of the noodles to help cook them (such a time saver to not have to precook!)
Bake covered for 45 minutes 
Uncover and sprinkle 1 c of cheese ( I just had co-jack tonight)
and bake till cheese melts.
Enjoy!
I so enjoy making food that is actually good for my family and is equally enjoyable!  My children have not licked their plates as clean as they did tonite in quite a while so we will be having this one again soon.

Super Delicious (& Healthy) Honey Applesauce Bars

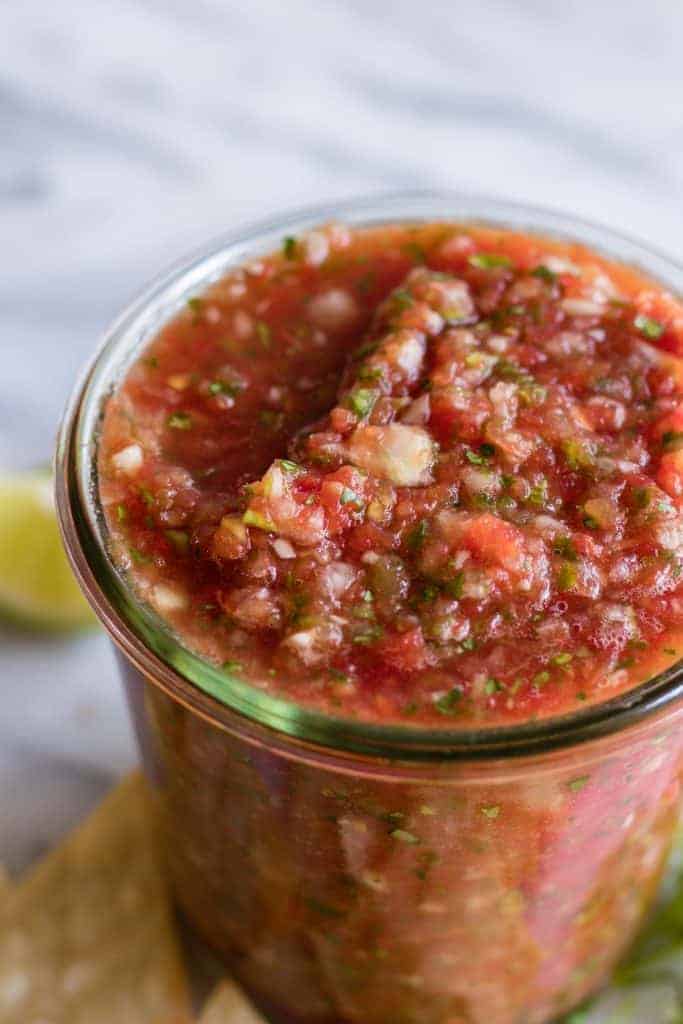
I came across an absolutely amazing-to-good-to-keep-to-myself recipe today.  I was on a search for a way to utilize my freshly ground whole wheat and also use honey as I am completely out of sugar right now.
Years ago my mom gave me the cookbook, Cooking with Wisdom, which I have to admit I rarely use as it is almost to “healthy” oriented for my personal tastes (I love chocolate–carob doesn’t cut it!)

However the recipe for Applesauce cookies stuck out to me as one that might be ok, did some revisions, added frosting and WOWZA!  It was a huge hit with the kidos and blew my diet for the day too!

Here is the recipe:

  • 1c honey
  • 1/2 c butter
  • Blend well then add:
  • 2 eggs
  • 1 c unsweetened applesauce
  • Sift together and add:
  • 2 1/2 c freshly ground whole wheat (I used soft white wheat berries that are excellent for pastries)
  • 1/2 t salt
  • 1 t bkg soda
  • 1/2 t bkg pwd
  • 1 t cinnamon
  • 1 t vanilla
  • Mix well and pour into jelly roll pan (12 x 15) and bake at 350 for 20-25 minutes or until toothpick inserted comes out clean.
  • cool and frost with:
  • 1 – 8 oz cream cheese ( I used Nancy’s organics with probiotics)
  • 1/2 c butter
  • 2-3 c pwd sugar (dependent on how thick you like your frosting)
Yum Yum and more Yum! 
Grab a glass of milk (which ever you prefer-some of mine had almond and some had regular ole cow’s milk) & ENJOY!